Replace shower faucet handle may seem like a difficult task, but it’s a simple DIY project that requires some technical work, but with the right guidance, you can do it yourself. You can save up to 60% of the cost by doing it yourself, instead of hiring a professional. If your handle is old, loose, or damaged, this guide will help you restore it and upgrade your bathroom. If you’re still unsure, a video guide is also provided at the end of this guide to help you understand the process better.
Table of Contents
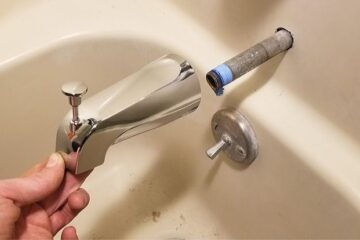
1: Remove the Old Handle

Begin by locating the set screw that secures the handle in place. This screw is usually found on the side or underneath the handle. Use the appropriate tool, such as an Allen wrench or screwdriver, to loosen the screw by turning it counterclockwise. Once the screw is loose, gently pull the handle away from the valve stem. If the handle is stuck due to mineral buildup or age, apply a penetrating oil to loosen the connection. Alternatively, you can use a handle puller tool to provide extra leverage and safely remove the handle without damaging surrounding components.
2: Inspect the Valve Stem

Once the old handle is removed, carefully inspect the valve stem for any visible damage, such as cracks, corrosion, or wear. If you notice mineral deposits or buildup, prepare a cleaning solution by mixing equal parts vinegar and water. Dip a cloth or brush into the solution and scrub the valve stem thoroughly to remove any debris. After cleaning, wipe the valve stem dry to ensure it’s ready for the new handle. Confirm that the valve stem is in good working condition. If it shows signs of significant damage, consider replacing it to ensure the functionality of your new handle.
3: Install the New Handle

Align the new handle with the valve stem by positioning it carefully and sliding it onto the stem. Ensure that it fits snugly and is properly aligned. Insert the set screw into its designated hole and tighten it using an Allen wrench or screwdriver. Turn the screw clockwise until the handle is firmly secured, but avoid overtightening, as this could damage the handle or valve stem. Once attached, test the handle by rotating it to ensure it moves smoothly and without resistance. If the handle feels tight or misaligned, loosen the set screw slightly, adjust the position, and retighten.
4: Attach the Escutcheon (Optional)

If you are replacing the escutcheon, the decorative plate surrounding the handle, position it over the valve and attach it with the provided screws. To prevent water from seeping into the wall, apply a thin bead of silicone caulk around the edges of the escutcheon. Use a caulk smoothing tool or your finger, dipped in soapy water, to smooth the caulk and create a neat, even seal. This step ensures the area is watertight and protected from potential water damage or mold growth.
5: Test the Handle

Once the installation is complete, restore the water supply by turning on the main valve or shut-off valve. Rotate the new handle to check if it operates smoothly and controls both water flow and temperature adjustments correctly. Inspect the installation for any leaks around the handle or escutcheon. If the handle feels loose or if leaks occur, tighten the set screw further. You can also wrap plumber’s tape around the valve stem to improve the seal if necessary. If any issues persist, revisit the steps to ensure all components are properly positioned and secured.
Most Related Article
How to Replace a Shower Handle
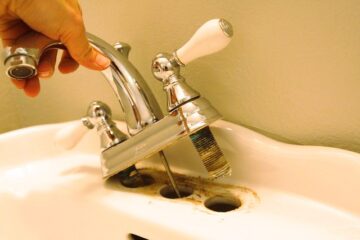
How to Remove Old Bathroom Sink Faucet?
How to Remove a Bathroom Sink Faucet Handle Without Screws?
FAQS
What should I do if the handle is hard to turn after installation?
If the handle is hard to turn, inspect the valve stem for debris or misalignment. Clean the stem thoroughly and ensure the handle is properly aligned before tightening the set screw. If the issue persists, the valve itself may need repair or replacement
What are the signs that I need to replace the valve, not just the handle?
If the valve stem is corroded, damaged, or leaking, replacing the handle alone may not solve the problem. In such cases, you’ll need to replace the valve. Persistent leaks or difficulty controlling water temperature are also signs that the valve may need replacement
Why is my faucet leaking after replacing the handle?
A leaking faucet after replacing the handle could be due to a loose set screw or an improper seal. Tighten the set screw securely and apply plumber’s tape to the valve stem to ensure a watertight connection. If the leak persists, inspect the valve stem for damage or debris
Can you replace a shower handle without replacing the valve?
Yes, you can replace a shower handle without replacing the valve, as long as the new handle is compatible with your existing valve system. If you’re unsure about compatibility, consider using a universal faucet handle kit, which is designed to fit most valve types.