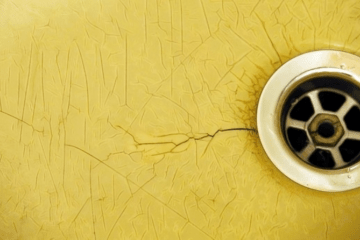
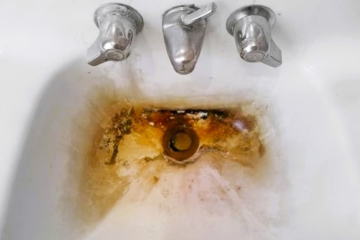
Dealing with a peeling bathtub can be frustrating, especially when it makes your bathroom look old and worn. But the good news is you can easily fix it yourself. There’s no need to spend hundreds on a professional when you can restore your bathtub’s finish using a few simple tools and materials.
In this guide, we’ll walk you through the steps to repair your peeling bathtub, from prepping the area to applying a new finish. Whether you’re a seasoned DIYer or just getting started, this step-by-step process will help you get your bathtub looking brand new again. By taking on this simple project, you’ll not only restore your tub’s smooth and fresh look but also save a lot of time and money.
Table of Contents
How to Prevent and Fix a Peeling Bathtubs?
Before we jump into how to fix a peeling bathtub, it’s useful to understand why peeling happens in the first place. Knowing the causes can help you prevent it from happening again in the future. Here’s a closer look at why bathtubs peel:
Old Refinishing Jobs
If your bathtub was refinished in the past and the job wasn’t done correctly, the coating might not stick well. Over time, this can cause the finish to peel away, leaving your tub looking worn out.
Harsh Cleaners
Using strong or abrasive cleaning products can be tough on your bathtub. These harsh chemicals can break down the protective coating, leading to cracks and peeling. It’s best to use gentler, non-abrasive cleaners to keep your tub in good shape.
Age and Use
Bathtubs naturally age and get worn with regular use. As they get older, the top layer of the tub can start to flake off, especially if the tub hasn’t been maintained properly.
Moisture
Constant exposure to water and humidity can damage your tub’s surface over time. If the tub isn’t well-maintained, this moisture can cause the surface to deteriorate and peel.
When you see peeling, it’s important to address it sooner rather than later. Ignoring it can lead to more serious problems like rust, mold, or even leaks, which can be more expensive and complicated to fix.
What Tools and Materials Are Needed for Fixing a Peeling Bathtub?
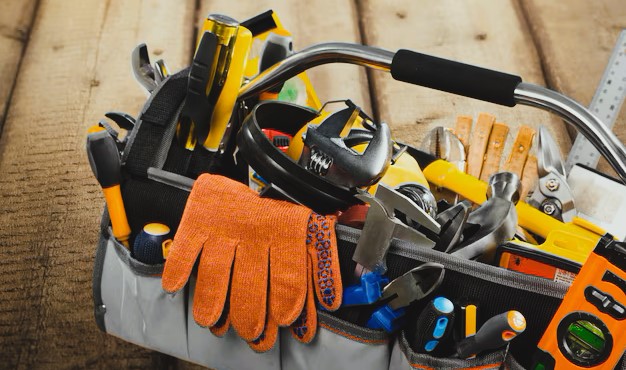
Before you get started on repairing your bathtub, you’ll need to gather a few tools and materials. Most of these items are easy to find at your local hardware store or online. Here’s a handy list to help you get everything you need:
- Bathtub Refinishing Kit: Look for a kit specifically designed for tub surfaces. This will include most of the supplies you need for the job.
- Epoxy: If your refinishing kit doesn’t come with epoxy, you’ll need to get some separately. This helps to create a durable finish.
- Sandpaper: You’ll need two types—220-grit for the rough work and 400-grit for smoothing things out.
- Non-Abrasive Cleaner: Use a mild cleaner like vinegar or a gentle dish soap to clean the tub without damaging it.
- Putty Knife or Scraper: This tool will help you remove any old, peeling paint from the tub.
- Painter’s Tape: Use this to mask off areas you don’t want to paint, like faucets and tiles.
- Drop Cloths or Plastic Sheeting: Protect your floors from any splatters or spills with these.
- Safety Gear: Don’t forget gloves, goggles, and a mask to keep yourself safe from fumes and dust.
Having these tools and materials ready will make the repair process smoother and more efficient. You’ve got this—just gather your supplies and you’re ready to go!
What Are the Steps to Repair a Peeling Bathtub?
Now that you’ve got your materials, it’s time to get started on the repair. Follow these steps carefully to ensure the best results.
1. Clean the Bathtub Thoroughly
The first and most important step is to clean your bathtub. Any dirt, grime, or soap scum left on the surface can prevent the new coating from sticking properly.
Use a non-abrasive cleaner like vinegar or a mild detergent. Scrub the surface thoroughly, especially around the areas where the peeling is most noticeable. After cleaning, rinse the tub with warm water and let it dry completely.
Tip: If there’s any mold or mildew, treat it with a mixture of bleach and water before proceeding.
2. Sand Down the Peeling Areas
Next, grab your sandpaper. You’ll need 220-grit sandpaper to start, as this will help remove the peeling paint and smooth the surface. Sand down all areas where the coating has started to peel, as well as the surrounding areas to ensure a smooth transition.
Once the loose paint is gone, switch to 400-grit sandpaper to lightly sand the entire surface of the tub. This will give the new finish something to stick to and help prevent future peeling.
3. Repair Any Chips or Cracks
If your bathtub has any chips, cracks, or dents, now’s the time to fix them. Use a bathtub repair kit to fill in these areas. Apply the filler using a putty knife and smooth it over the damaged spots.
Allow the filler to dry according to the instructions on the kit. Once dry, sand down the repaired areas until they are smooth and level with the rest of the tub.
4. Protect the Surrounding Areas
Before you apply the new finish, you’ll need to mask off any areas you don’t want to get paint on. Use painter’s tape to cover the faucets, drain, and any surrounding tile. Lay down plastic sheeting or drop cloths to protect your floors from splatters.
Tip: Make sure to cover all areas carefully. This will help avoid extra cleanup later and ensure your finish looks professional.
5. Apply the New Finish
Now comes the most important part: applying the new finish. If you’re using a bathtub refinishing kit, follow the manufacturer’s instructions closely.
- Mix the epoxy or paint if necessary.
- Apply the first coat evenly with a paintbrush or spray gun, depending on the product. Use smooth, even strokes to avoid drips and streaks.
- Let the first coat dry completely. This usually takes about 24 hours, but check your product’s instructions for specific drying times.
- Once the first coat is dry, lightly sand the surface again with 400-grit sandpaper to remove any imperfections.
- Apply the second coat of finish, ensuring full coverage.
Allow the second coat to dry completely before moving on to the final steps.
6. Let the Tub Cure
After you’ve applied the final coat, it’s important to let the tub cure. This is where many DIYers make mistakes by rushing the process. The curing time usually takes 48 to 72 hours, depending on the product.
During this time, avoid using the bathtub to ensure that the finish sets properly. If you use the tub too soon, it can cause the new coating to peel or crack.
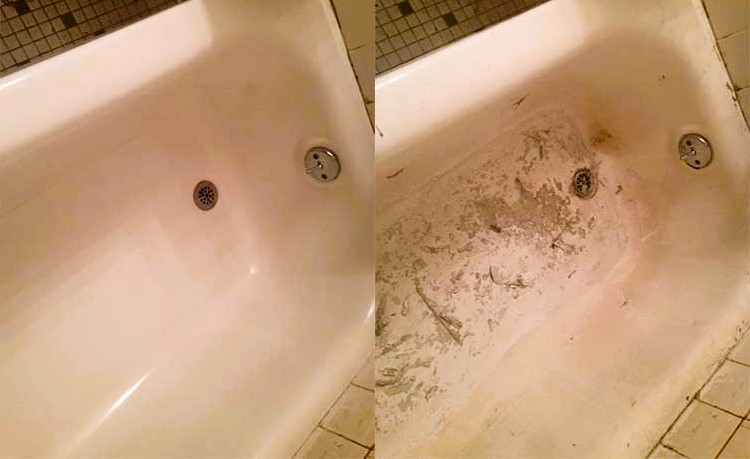
How to Properly Care for a Bathtub After Repair?
Now that your bathtub looks brand new again, it’s essential to take proper care of it to prevent future peeling. Here are a few tips to help you maintain your tub:
- Use gentle cleaners: Avoid harsh chemicals like bleach or abrasive scrubbers. Instead, opt for non-abrasive cleaners to keep the surface intact.
- Dry the tub after each use: Wiping down your bathtub after each use can help prevent water damage and peeling over time.
- Avoid bath mats with suction cups: These can pull on the new coating and cause it to peel again.
- Regular inspections: Check the tub regularly for any early signs of peeling or damage. Address small issues before they turn into bigger problems.
By following these simple maintenance tips, you can extend the life of your newly refinished bathtub and keep it looking fresh for years to come.
What Are the Top Mistakes to Avoid When Fixing a Peeling Bathtub?
Fixing a peeling bathtub is pretty straightforward, but there are a few common slip-ups you’ll want to avoid to get the best results. Here’s what to watch out for:
- Skipping the Cleaning Step: Make sure to clean your tub thoroughly before you start. If you skip this, the new finish might not stick properly, which can lead to peeling later on.
- Not Sanding Enough: It’s crucial to sand the peeling areas well. If you don’t sand enough, the new coating may not adhere properly, and you might see peeling again soon after.
- Using the Wrong Products: Always use products that are specifically designed for bathtubs. Regular paint just won’t stand up to the moisture and can start peeling quickly.
- Rushing Drying and Curing Times: Patience is key here. Allow each coat to dry completely before moving on to the next step. Rushing this process can lead to a finish that doesn’t last or even more peeling.
Avoiding these common mistakes will help you achieve a smooth, long-lasting finish. Keep these tips in mind, and you’ll be on your way to a beautifully repaired bathtub!
When to Call a Professional?
This bathtub repair project is definitely something you can handle on your own, but there are times when it might make sense to call a professional. If your tub has serious issues like deep rust or big cracks, or if you’re not comfortable working with epoxy paint, a professional might be your best bet.
Professionals have the skills and experience to deliver a smoother, more durable finish that can last longer than a DIY job. However, keep in mind that professional services can be more expensive.
If you’re unsure about tackling the job yourself, or if the damage is beyond what you’re comfortable fixing, don’t hesitate to reach out to a professional. They can help ensure your bathtub gets the high-quality repair it needs.
FAQs
Q: How long will my repaired bathtub last?
A properly done repair should last between 3 to 5 years, depending on the quality of the materials used and how well you maintain your tub.
Q: Can I use regular paint for my bathtub?
No. You should always use epoxy paint or a bathtub refinishing kit designed specifically for bathtubs. Regular paint won’t hold up against moisture and will start peeling quickly.
Q: Why is my bathtub peeling in the first place?
Bathtubs typically peel due to improper application of a previous finish, exposure to harsh cleaning chemicals, or wear and tear over time.

