Installing an undermount sink may seem challenging, but it is a project that enhances your kitchen’s functionality and style. Success lies in preparing the countertop properly, ensuring precise alignment, and securing the sink firmly in place. Taking time to do the job carefully ensures a durable and attractive result. An undermount sink is a practical and stylish addition that elevates the overall design of your kitchen. With attention to detail and proper tools, the finished installation will not only look great but also provide long-lasting performance for your daily needs.
Table of Contents
1: Prepare the Countertop

Proper preparation of the countertop is crucial for a successful installation. Whether you’re working with a new or existing countertop, follow these steps:
Clear the Workspace: Remove any items from the countertop and empty the cabinets below the sink area. This will give you enough room to work comfortably.
Inspect the Countertop: Check the countertop for any damage or uneven surfaces. If you’re using a new countertop, ensure the sink cutout matches the dimensions of your undermount sink.
Clean the Surface: Use a cleaning cloth and mild detergent to remove dust, grease, or debris from the underside of the countertop. A clean surface ensures better adhesion for the sealant.
Sand Rough Edges: If the cutout edges are rough, sand them down to create a smooth surface. This will help the sink fit snugly and prevent damage to the sealant.
2: Position the Sink

Positioning the sink correctly is one of the most important steps in the installation process. Follow these instructions to ensure proper alignment:
Flip the Countertop (if not installed): If the countertop is not yet attached to the cabinets, flip it over to work on the underside. This makes positioning the sink easier.
Align the Sink: Place the sink beneath the countertop cutout. Use a measuring tape to ensure it is centered and aligned with the edges of the cutout.
Decide on the Reveal Style: Choose between a zero reveal (flush with the countertop), positive reveal (part of the sink rim is visible), or negative reveal (the sink rim is hidden under the countertop). Mark the alignment accordingly.
Secure Temporarily: Use clamps or braces to hold the sink in place temporarily. This will prevent it from shifting while you apply the sealant and attach the mounting clips.
3: Apply Silicone Sealant

Silicone sealant is essential for creating a watertight bond between the sink and the countertop. Here’s how to apply it correctly:
Prepare the Sealant: Cut the nozzle of the silicone tube at a 45-degree angle to control the flow. Load the tube into a caulk gun.
Apply the Sealant: Run a continuous bead of silicone around the edge of the sink cutout on the underside of the countertop. Ensure the bead is even and consistent to prevent leaks.
Smooth the Bead: Use a wet finger or a caulking tool to smooth the silicone bead. This ensures proper adhesion and a neat finish.
4: Attach Mounting Clips

Mounting clips are used to secure the sink to the countertop. Follow these steps to attach them:
Position the Clips: Place the mounting clips around the perimeter of the sink. Ensure they are evenly spaced for balanced support.
Tighten the Screws: Use a screwdriver to tighten the screws on the mounting clips. Be careful not to overtighten, as this can damage the countertop or the sink.
Check for Movement: Gently press on the sink to ensure it is firmly attached. If it moves, tighten the clips further.
5: Check Alignment

Before the sealant cures, double-check the alignment of the sink to ensure it is straight and level:
Use a Level: Place a level across the sink to confirm it is perfectly horizontal. Adjust the clamps or screws as needed.
Inspect the Edges: Look at the edges of the sink to ensure they are evenly aligned with the countertop cutout.
Make Final Adjustments: If the sink is misaligned, reposition it carefully before the sealant sets.
6: Allow the Sealant to Cure
Curing time is critical for the silicone sealant to form a strong, watertight bond. Follow these guidelines:
Wait 24 Hours: Allow the sealant to cure for at least 24 hours before using the sink. Avoid attaching plumbing or applying pressure during this time.
Inspect the Seal: After the curing period, check the seal for any gaps or weaknesses. Reapply silicone if necessary.
7: Connect Plumbing

Once the sealant has cured, you can connect the plumbing fixtures:
Install the Drain: Attach the sink drain according to the manufacturer’s instructions. Use plumber’s putty to create a watertight seal.
Reconnect Water Lines: Reconnect the water supply lines and test for leaks.
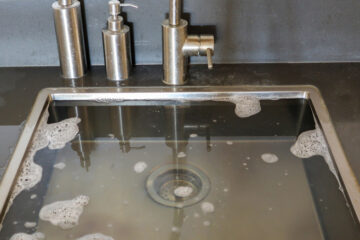
Test the Sink: Run water through the sink to ensure there are no leaks around the edges or in the plumbing connections.
Related Post
How to Install Undermount Kitchen Sinks
How to Tighten a Kitchen Sink Faucet
FAQS
How long does the silicone sealant take to cure?
Silicone sealant typically takes at least 24 hours to cure fully. During this time, avoid attaching plumbing or applying pressure to the sink. After the curing period, inspect the seal for any gaps or weaknesses and reapply silicone if necessary.
Can I install an undermount sink on any countertop?
No, undermount sinks require a solid, non-porous countertop material like granite, quartz, or solid surface. These materials are strong enough to support the weight of the sink. Laminate or wood countertops are generally unsuitable unless reinforced, as they may not provide the necessary structural support.
What are the benefits of choosing an undermount sink over a drop-in sink?
Undermount sinks offer a sleek, modern look by being installed beneath the countertop, creating a seamless surface. They make cleaning easier since there are no raised edges to trap crumbs or debris. Additionally, they maximize counter space and are compatible with various countertop materials like granite and quartz, enhancing both functionality and aesthetics.
What are the weight considerations for undermount sinks?
Heavy sinks, such as those made of cast iron or granite composite, require strong support. Use mounting clips, brackets, or support systems like Sink Setters to ensure the sink is securely attached. Relying solely on adhesive is not recommended for heavy sinks.
How do I ensure my sink is level during installation?
Use a level to check the sink’s alignment before the silicone sealant cures. Adjust the clamps or mounting clips as needed to ensure the sink is perfectly horizontal. This step is crucial for proper drainage and a professional finish.