A dripping bathtub faucet is more than just an annoying sound. Over time, it can lead to significant water waste and higher utility bills. In fact, even a slow drip can waste up to 20 gallons of water per day, costing you more than you realize. Beyond the financial impact, excess moisture can contribute to mold growth and damage around your bathtub. Fortunately, learning how to fix a dripping bathtub faucet is a simple DIY task that can save you both time and money.
In this guide, we’ll walk you through the most common causes of a leaking bathtub faucet and provide step-by-step instructions to fix a dripping bathtub by yourself. Whether the issue lies in a worn-out washer, a faulty cartridge, or an O-ring problem, you’ll find the solution here. With just a few tools and some basic knowledge, you can restore your faucet to perfect working condition and eliminate that pesky drip for good.
Table of Contents
What Are Causes of a Dripping Bathtub Faucet?
Before diving into the repair process, it’s essential to understand why your bathtub faucet might be dripping. Here are some common causes a dripping bathtub faucet:
1. Worn-out Washers
The most common culprit behind a dripping faucet is a worn-out washer. Over time, washers inside the faucet can wear down due to the constant pressure of water flow, leading to a drip. Replacing a faucet washer is often the most straightforward fix.
2. Damaged Cartridge or Valve Seat
In cartridge faucets, a faulty or worn-out cartridge can cause the faucet to drip. Similarly, the valve seat, which connects the faucet and the spout, can corrode or become damaged over time. This can result in a drip, even when the faucet is off.
3. O-Ring Problems
O-rings are small rubber rings that help seal parts of the faucet. When these wear out, they can cause water to leak from the handle area of the faucet. Replacing the O-ring can quickly stop the leak.
4. Loose or Worn Handles
A loose or faulty faucet handle may also contribute to dripping. When the handle doesn’t close the valve tightly, water may continue to drip from the faucet.
What Tools and Materials Needed to fix a Dripping Bathtub Faucets?
Before you start, gather the necessary tools and materials to make the job easier:
Tools: Screwdrivers, adjustable wrench, Allen wrench, pliers
Materials: Replacement washers, O-rings, valve cartridge (if necessary), plumber’s grease
Optional: Teflon tape, plumber’s tape, towels for cleanup
Having these items on hand will ensure you don’t have to pause mid-project to search for what you need.

How Can You Fix a Dripping Bathtub Faucet? (Step-by-Step Guide)
Now that you understand the causes and have your tools ready, let’s dive into the process of fixing a leaking bathtub.
Step 1: Turn Off the Water Supply
Before starting any repair, always turn off the water supply to the faucet. Locate the shutoff valves under the sink or near the bathtub, and turn them off. If your home doesn’t have localized shutoff valves, you may need to turn off the water at the main shutoff.
Once the water is off, turn the faucet on to release any remaining water in the pipes.
Step 2: Remove the Faucet Handles
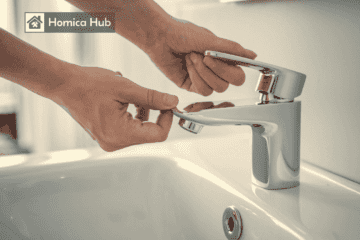
Using a screwdriver or an Allen wrench, carefully remove the faucet handles. Depending on your faucet type, the screws may be hidden under a decorative cap. Be gentle to avoid damaging the handles during removal.
Step 3: Inspect and Replace Washers or O-Rings
Once you’ve removed the handles, you should have access to the internal components of the faucet. Inspect the washers and O-rings for wear and tear. If they look worn or damaged, it’s time to replace them. Be sure to bring the old parts with you to the hardware store to find an exact match.
To replace the washer or O-ring:
- Apply a small amount of plumber’s grease to help the parts fit snugly.
- Remove the screw holding the washer in place.
- Replace it with a new washer or O-ring of the same size.
Step 4: Inspect and Replace the Cartridge or Valve Seat
If your bathtub faucet uses a cartridge, inspect it for signs of damage or wear. A damaged cartridge can prevent the faucet from sealing properly, leading to leaks. You may need to remove the cartridge and replace it with a new one.
Similarly, check the valve seat for any signs of corrosion. If the valve seat is damaged, it may need to be replaced or cleaned with a seat wrench.
Step 5: Reassemble the Faucet
After replacing any damaged parts, reassemble the faucet. Reattach the handles, making sure they are tightened properly. Be careful not to overtighten, as this can cause damage to the faucet.
Step 6: Turn the Water Supply Back On and Test
Turn the water supply back on slowly and test the faucet. Run water through the faucet and check for any leaks. If the dripping has stopped, congratulations! You’ve successfully fixed your leaking bathtub faucet.

What Problems Might You Encounter When Fixing a Dripping Bathtub Faucet?
Even after following these steps, you might still encounter some issues. Here are some troubleshooting tips:
Still Leaking After Repair
If your bathtub faucet is still leaking after replacing the washer or cartridge, you may have used the wrong size or failed to install it correctly. Double-check the parts and try again.
Difficulty Removing a Stuck Cartridge
If you’re having trouble removing a stuck cartridge, you may need a cartridge puller. You can also try soaking the cartridge in vinegar to break down mineral deposits that might be causing it to stick.
Handle Tightness Issues
If the faucet handles feel too tight or loose after reassembly, adjust them accordingly. Be careful not to overtighten, as this can lead to new leaks.
How Can You Prevent Future Leaks?
To avoid future leaks and prolong the life of your bathtub faucet, regular maintenance is essential. Here are some tips:
- Check washers and cartridges regularly for signs of wear.
- Consider using water softeners to prevent mineral buildup and corrosion.
- Address minor leaks early to prevent major issues.
When to Call a Professional?
While fixing a dripping bathtub faucet is usually a simple DIY task, there are times when it’s best to call a professional plumber. If you notice significant water damage around the faucet, experience difficulty removing parts, or the problem persists after multiple repairs, it may be time to seek expert help.
What Are the Benefits of Fixing a Dripping Bathtub Faucet?
Fixing a leaking faucet isn’t just about convenience—it also has significant environmental and financial benefits. A slow drip can waste up to 20 gallons of water per day, which adds up over time. By fixing the leak, you’ll not only save on your water bill but also contribute to water conservation efforts.
FAQs
1.How long does it take to fix a dripping bathtub faucet?
Typically, it takes about 1–2 hours to fix a leaking faucet, depending on the cause and how familiar you are with the tools and process.
2.Can I use any washer size for replacement?
No, you need to find the exact size of washer that fits your faucet. Bringing the old washer to the hardware store will help ensure a proper match.
3.How do I know if the cartridge needs to be replaced?
If replacing the washer or O-ring doesn’t stop the leak, or if you notice corrosion or damage to the cartridge, it likely needs replacing.
4.What is the difference between a compression faucet and a cartridge faucet?
Compression faucets use washers to seal the valve, while cartridge faucets rely on a cartridge to control water flow. Leaks in compression faucets are often due to worn washers, while cartridge faucets may leak due to damaged cartridges.


