Cracks in plastic bathtubs may seem like a major issue, but they don’t have to be left untreated. These cracks can cause leaks and even more damage to your bathroom. However, with the right approach, repairing a crack is simpler than you might think, and it can save you the cost of replacing the entire tub. You don’t need to be an expert to handle this; with a few basic tools you can restore your bathtub to its original condition. In this guide, we will walk you through the process step by step, from gathering materials to finishing touches. By following these simple steps, you will be able to fix your bathtub in no time, preventing future problems and extending its lifespan. Let’s get started!
Table of Contents
Why Do Plastic Bathtubs Crack?
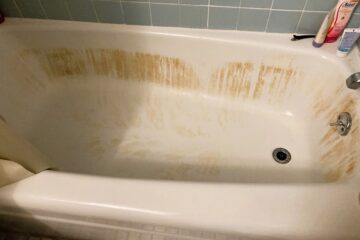
Cracks in plastic bathtubs are a common problem, especially as tubs age. These cracks not only look bad, but they can also lead to leaks and water damage if left untreated. Understanding why these cracks form can help you prevent them in the future and decide whether a repair is possible or if a replacement is needed.
Plastic bathtubs, typically made from acrylic or fiberglass, are popular because they’re lightweight and affordable. However, they can be prone to cracking over time. Some common reasons for cracks include:
- Age and wear: Over time, bathtubs can weaken due to constant exposure to water, soap, and cleaning products.
- Improper installation: If the tub isn’t supported properly, it can shift or sag, leading to cracks.
- Heavy use: Dropping heavy objects or applying excessive weight can stress the surface and cause cracks.
- Temperature fluctuations: Rapid temperature changes, such as filling the tub with hot water right after cleaning it with cold water, can cause the plastic to expand and contract, eventually leading to cracks.
Can You Repair a Plastic Bathtub Yourself?
Yes, in most cases, you can repair a plastic bathtub on your own. A do-it-yourself approach is cost-effective, and you only need basic tools and materials.Before you begin the repair process, it’s essential to determine the severity of the crack.
Hairline cracks are small and superficial, while larger, deeper cracks may penetrate the plastic, threatening the integrity of the tub. Surface cracks are often easy to fix, while deeper ones may require more advanced repairs or even professional help. For significant damage, it may be best to replace the bathtub altogether.
What materials and Tools are required to fix a crack in a plastic bathtub?
Before starting the repair process, it’s important to gather all the tools and materials you’ll need to fix the crack in your plastic bathtub. Having everything ready beforehand will make the job quicker and smoother. The good news is that most of these items are affordable and easy to find at any hardware store.
Essential Tools
Here are the basic tools you’ll need to get the job done:
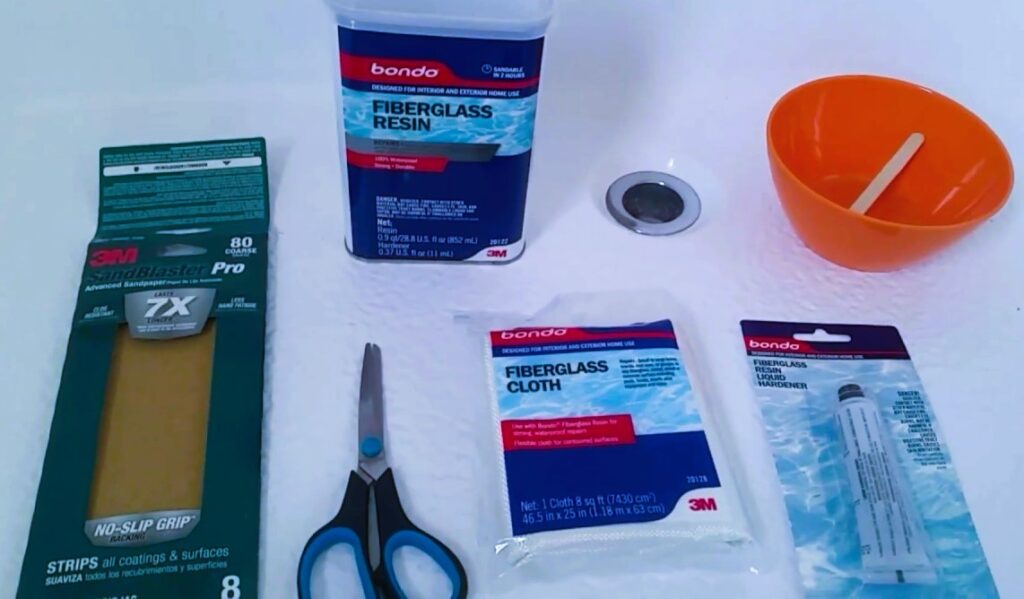
- Sandpaper: You’ll need fine-grit sandpaper to smooth the area around the crack. This helps the repair material stick better to the surface.
- Utility knife: A utility knife is useful for trimming any rough or loose edges around the crack.
- Fiberglass repair kit: This kit typically includes epoxy resin, a hardener, and fiberglass cloth. It’s designed specifically for repairing plastic and fiberglass surfaces.
- Putty knife: A putty knife will help you apply the repair material evenly over the cracked area.
- Caulk gun: If you need to apply any sealant, a caulk gun will make the job easier and more precise.
Materials for Repair
In addition to the tools, you’ll need a few key materials to complete the repair:
- Epoxy or fiberglass repair kit: These kits are made specifically for fixing cracks in plastic or fiberglass bathtubs. They include everything you need, like resin, hardener, and sometimes a color-matching paint.
- Waterproof tape (optional): This can be used as a temporary fix if you’re not ready for a full repair just yet.
- Paint or finish: Once the repair is complete, you may want to paint over the area to match the rest of the bathtub. Many repair kits come with color-matching options.
What are Step-by-Step Guide to Repairing a Crack in a Plastic Bathtub?
Repairing a crack in a plastic bathtub is easier than you might think, and with the right approach, you can restore your tub in no time. Follow these simple steps to ensure a successful repair. Whether it’s a small hairline crack or something more noticeable, these steps will help you fix the issue and prevent future problems.
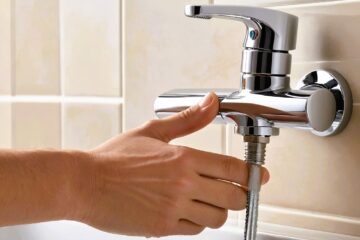
Step 1: Clean and Dry the Area Around the Crack
Before you begin the actual repair, it’s important to clean the area around the crack thoroughly. Dirt, soap scum, and other residues can stop the repair material from properly bonding to the bathtub surface.
- Use a non-abrasive cleaner and scrub the area gently to remove any buildup.
- Rinse it well with water, and make sure the area is completely dry before moving to the next step. A clean, dry surface ensures that the repair material will stick and hold firmly.
Step 2: Sand the Cracked Area
Once the area is clean and dry, you’ll need to sand around the crack. Sanding smooths out any rough edges and gives the repair material something to adhere to.
- Use fine-grit sandpaper to gently sand the crack and about an inch around it. This roughens up the surface and helps the repair patch stick better.
- After sanding, wipe away any dust with a clean, dry cloth to leave the surface smooth and ready for the next step.
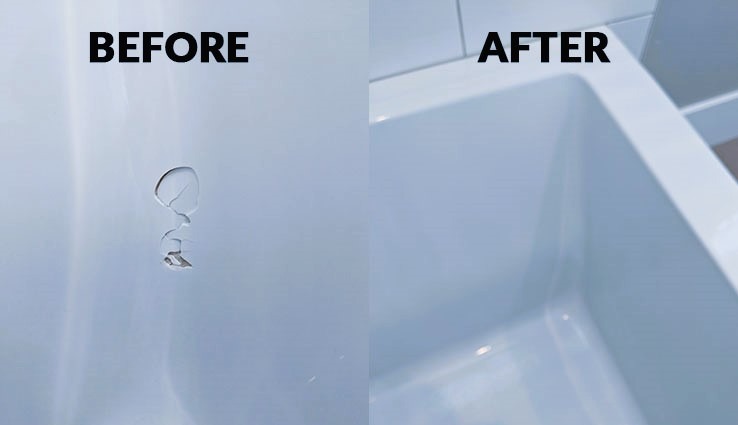
Step 3: Apply Epoxy or Fiberglass Patch
Now it’s time to apply the repair material. Depending on the size and depth of the crack, you may use either an epoxy resin or a fiberglass repair kit.
- Mix the epoxy: If you’re using epoxy, mix the resin and hardener as directed in the kit’s instructions. It’s important to get the mix right so it cures properly.
- Apply the epoxy: Use a putty knife to apply the epoxy mixture over the crack, ensuring you cover the entire damaged area. Spread it evenly for a smooth finish.
- Fiberglass patch: If your kit includes a fiberglass patch, place the patch over the crack after applying the epoxy. Press it firmly into place, ensuring there are no air bubbles. The fiberglass will provide extra strength to the repair.
Allow the epoxy or fiberglass patch to dry completely, following the curing time listed in the instructions. This step is crucial for ensuring the repair is strong and watertight.
Step 4: Smooth the Surface and Apply Finish
Once the repair has fully dried, you’ll need to sand the area again to blend the patch with the rest of the bathtub.
1- Use fine-grit sandpaper to smooth out the repaired area so it feels level with the surrounding surface.
2- If needed, you can apply a coat of paint or finish to match the color of your tub. This not only makes the repair less visible but also provides extra protection from wear and tear.
Tips for a Lasting Repair
Make sure to allow the repair to cure fully before using the bathtub again. Most kits recommend waiting 24 to 48 hours, but check the instructions on your specific product.
- Be careful not to rush the process. Allowing enough time for the materials to dry and cure will ensure a long-lasting, durable repair.
- By following these steps, you can easily fix the crack in your plastic bathtub and prevent it from getting worse. Not only will this save you money, but it will also extend the life of your bathtub, keeping it looking new for years to come.
How to Prevent Future Cracks in Your Plastic Bathtub?
Once you’ve repaired the crack in your plastic bathtub, it’s important to take steps to prevent future damage.
Regular Maintenance Tips
Regular maintenance is key to keeping your bathtub in good condition. Simple habits can make a big difference over time and help prevent cracks from developing.
- Gentle cleaning: Avoid using harsh chemicals or abrasive cleaners, as they can weaken the plastic. Instead, use mild soap and water or a cleaner specifically designed for plastic or fiberglass tubs.
- Inspect your bathtub: Regularly check for signs of wear and tear. Look for small hairline cracks or discoloration that may indicate early damage. If you spot any issues, address them immediately before they get worse.
By staying on top of regular cleaning and inspections, you can catch potential problems early and extend the life of your bathtub.
Choosing the Right Cleaning Products
The cleaning products you use can also affect the lifespan of your plastic bathtub. Some products are too abrasive or contain harsh chemicals that can damage the surface over time.
- Use mild cleaners: Stick to non-abrasive cleaners that are safe for plastic and fiberglass surfaces. Avoid using bleach or strong acids, as they can eat away at the protective layer of the tub, making it more prone to cracks.
- Avoid scrubbing pads: Don’t use rough scrubbing pads or steel wool to clean your bathtub, as they can scratch the surface and weaken the material. Soft clothes or sponges are gentler and just as effective.
(FAQs)
1) How long does a repaired crack in a plastic bathtub last?
If repaired properly, the fix can last for years, depending on the size of the crack and the quality of the repair materials used.
2) Can I paint over the repaired area to match the bathtub’s color?
Yes, many repair kits come with paint or a finish that matches common bathtub colors. You can also purchase a separate paint to blend the repair seamlessly with the rest of the tub.
3) What should I do if the crack gets worse after repair?
If the crack worsens, you may need to repeat the repair or consult a professional. Deep or spreading cracks may indicate structural problems that require professional attention.
4) Can I use my bathtub immediately after repair?
No, you need to allow the repair to fully cure. This typically takes 24 hours, but always check the product instructions for specific curing times.